That was a long way round to say that I found another pattern in that collection to accompany my tricolor coat. Also a big thank you to everyone for all your wonderful comments on my finished coat. I was sure the color combo would not appeal to many people other than me, so I appreciate all your nice words so much. I have been wearing it a lot! And not shipping it off to anyone. A few readers here and on Pattern Review who requested I do so :) By the way - I did enter into the Color-Blocked contest on Pattern Review, the voting is now open until 12/24.
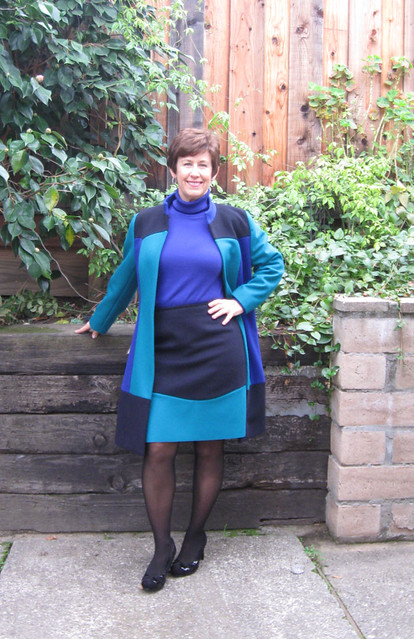
This is the Wave skirt, Burda 12/2012 # 109. Which is going straight into my small collection of TNT patterns as it is a breeze to sew and fit beautifully. A tiny bit of extra study of the pattern pieces to make sure I got the wavy section right, but otherwise a very nice pattern that I could see adjusting for other things or even as the bottom half of a dress.
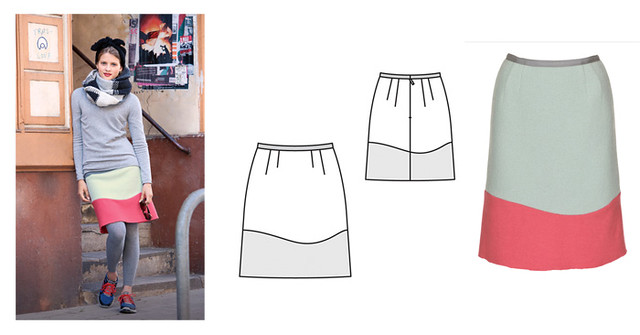 What I really liked about this pattern are the darts which give a great fit front and back. Also this pattern calls for fulled loden fabric which I suppose is felted wool? In any case my coating fabric seemed just right. And Bonus! it calls for no hem, which also is something you can do with this type of felted fabric. Of course that means I needed to get the length just right before cutting out. I did that by comparing to one of my other skirts and figured out the total length, which turned out to be similar to the pattern so no change. For size I cut out the size for my hip measure and took in the waist to fit.
In the tech drawing it showed a zipper in the center back but I thought the zip was on the side, and that is how I sewed it. Which actually seems better, so no seam bisecting the contrast wave at the bottom back.
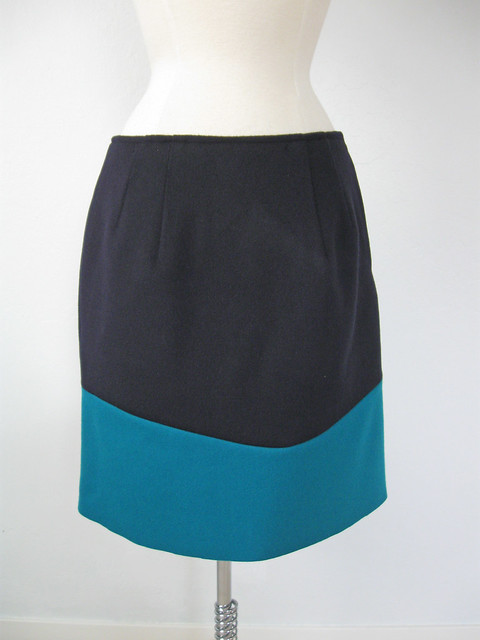
No waistband, I used my method of "waistband-less" skirt making, as I did with this skirt.
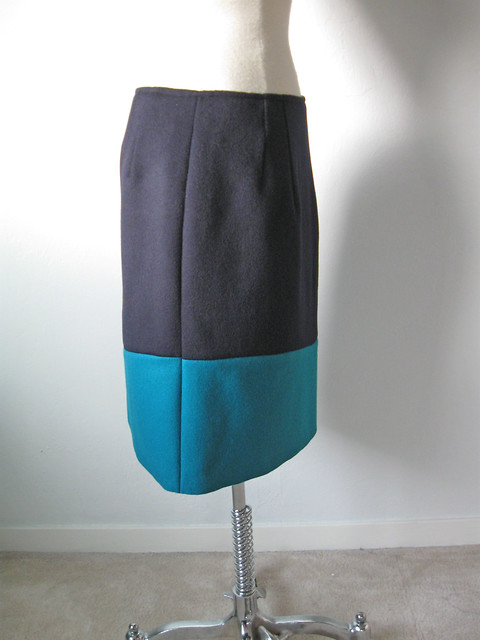
Side view. The only slightly tricky bit was making sure that the intersection on the side seams matched up perfectly for the color blocking.
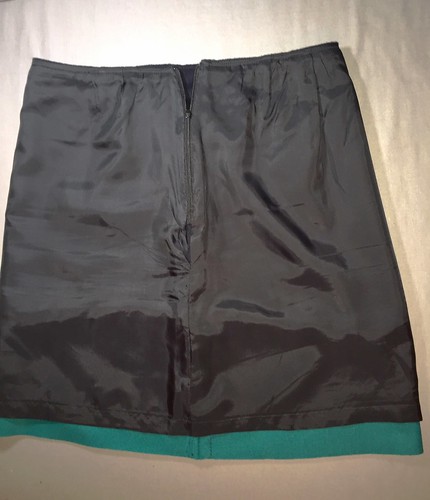
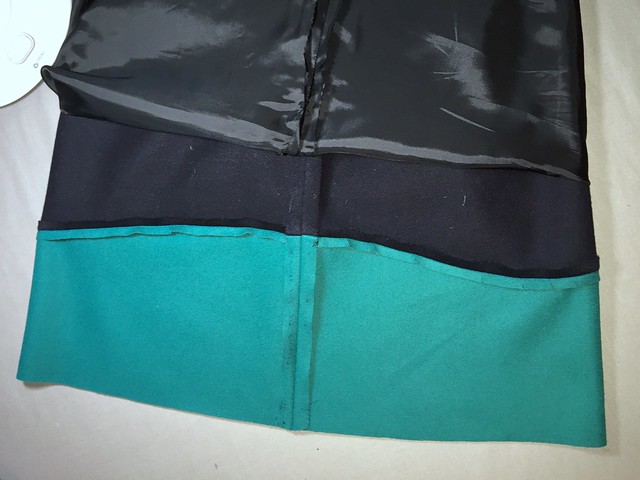
Inside view. I am often asked how I finish lined garments or what treatment I use on the seams. For the most part the answer is none! I don't think a lined wool garment needs any seam finish. For winter weight fabrics serging just adds bulk and to me is mostly a waste of time, (exception made for all items sewn from denim :) It is nice to use on prone-to-.ravel fabrics but otherwise I think not necessary. On a lined garment the lining should look good, but peeling back the onion to see the insides - who cares what it looks like there.
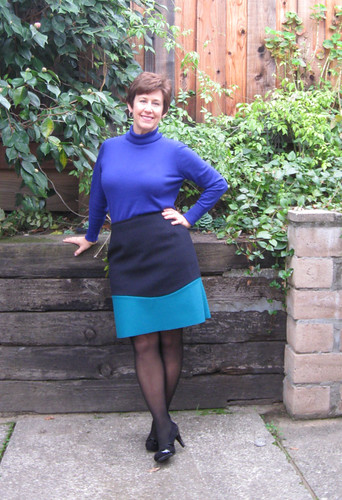
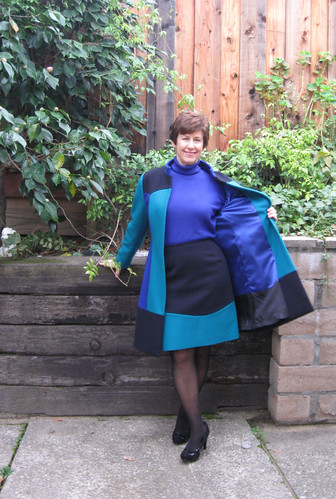
I am not likely to wear any top or sweater tucked in like this but figured I would show how the skirt looks on me and the proportion of the two color sections.
In my previous post with the completed Tri-color coat I said I would post some more construction details so here goes, a bunch of construction pics with some notes. If you like seeing how things are made then this section is for you.
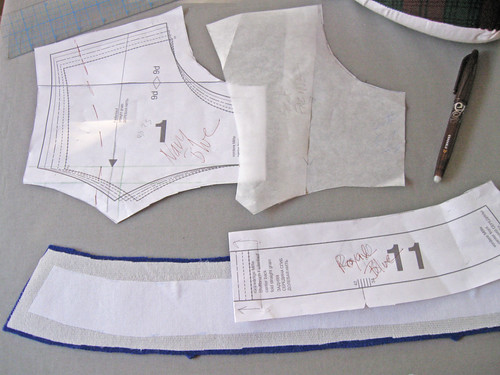
First up: I am an interfacing maniac. Coats need a lot. Or I can rephrase that - coats and jackets should have a lot of interfacing. More than you think. These fabrics were hefty enough that the interfacing was not as necessary as in a lighter wool, but interfacing the various sections allows for invisibly catch stitching down the seam allowances, plus I think the shoulders on a jacket should kind of float, or at least have some substance as opposed to sink and rest in the hollows of the upper body. Does that make sense?
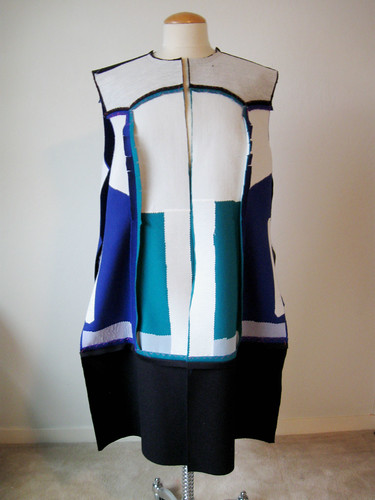
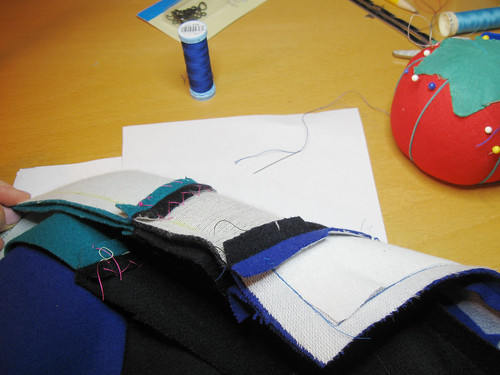
For the intersections of the yoke and the two color sections of the body, having white interfacing on the dark fabrics seemed like a necessity in order to accurately sew those junctions. The coat front on the left is sewn but not pressed, and you can see it is looking good already.
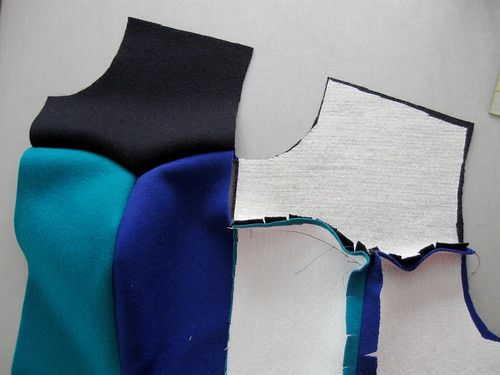
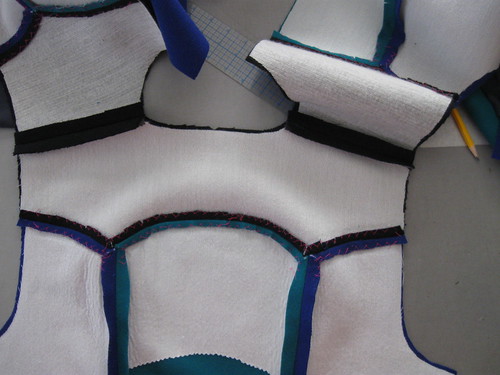
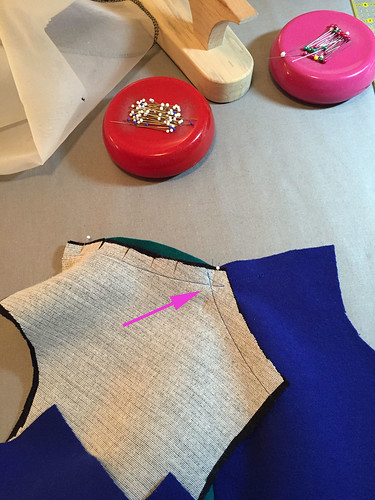
The pink arrow shows where the stitching ended, and then I started up on the other side. I could not see any way to sew this continuously across the yoke and have the seam allowances not all bunched up in the seam. Because you know I am a mad about seam trimming and grading.
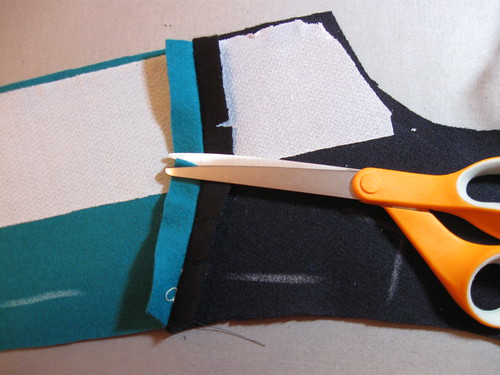
Curves need clipping. I clip before grading, just seems easier. Also note all my wax chalk marks designating wrong side of fabric. Once interfacing is applied then it is obvious but oh so easy to apply interfacing to the right side of a piece and then shrieking ensues.
Collar: I put some extra interfacing just in the collar portion as I wanted it to stand up properly. That extra bit is a Shirt-crisp interfacing which I actually find too crisp for shirts (I suppose it is just right for collars on men's dress shirts) anyway I ordered it ages ago and never used it. But it pays to have a selection of interfacings. Only applied in the body of the collar, I trimmed away the seam allowance portions.
Here is the collar plus collar/front facing sewn onto the coat. I think I took this photo to show the color block seam matching which seemed critical to me at the time. After bothering to create the color blocked facing I guess it was important to sew it accurately :).
A few notes on pressing.
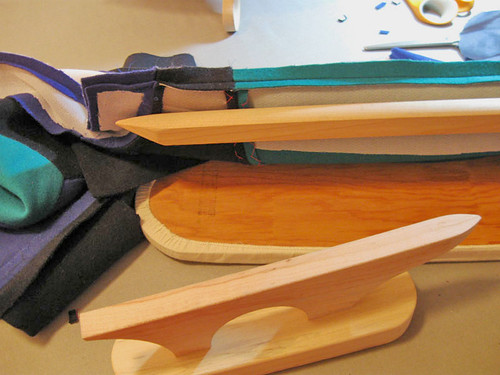
In front is the clapper but the real star in this image is my sleeve board which has convertible sections and the most used one is this long pointy piece. It is ideal for pressing long seams and front facings.
Once the long center fronts are pressed open, trimmed and graded, then pressed over the hand stitching begins. I think you either love hand sewing or consider it a major pain. I love doing it. I generally hand sew all linings into coats instead of bagging the lining. I like the control of hand sewing, usually I create my own lining pieces on the fly, and I hand stitch all the coat or jacket facings down to the coat body so actually bagging the lining is not even possible.
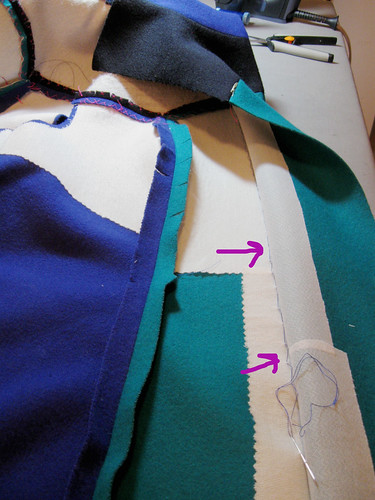
This is the long center front of the coat. These thick fabrics wanted to pop open a bit no matter how much pressing is done, so I first took a long running stitch with silk thread along the inside (see pink arrows) to keep the front facing flat.
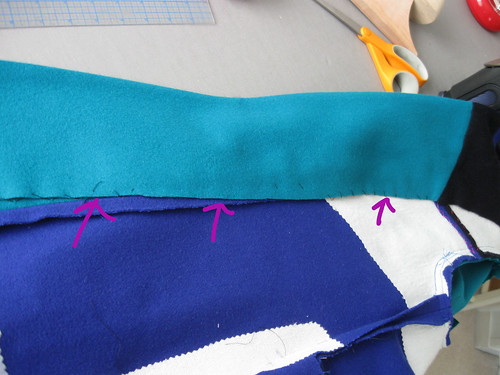
Then I tacked down the entire facing with loose stitches to the coat body. Now it will not shift or move and the coat front will stay flat, no chance the facing/lining will roll outward.
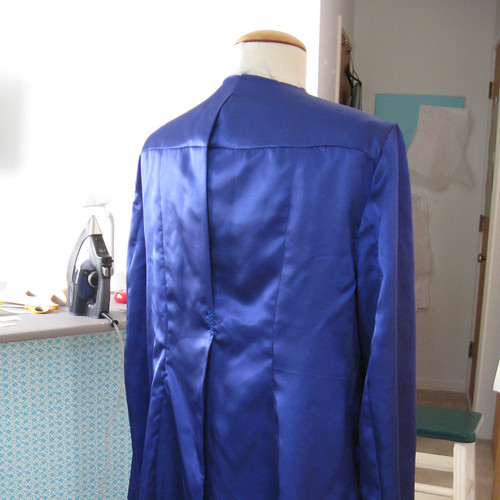
Lastly, the lining sewn up and ready to be hand stitched into the coat. I straightened out the curved yoke on the lining pieces, easier to sew. Also added the center back pleat, and continued the lining up to the collar as I usually do (seen here on this coat post)
So final result - coat, lining, skirt. A color-blocking extravaganza. In case you are wondering why I did the skirt colors reverse of the coat - I just thought I would get more wear from the skirt being the dark navy. So various tops would go with. If it were the green it is a bit limiting.
Whew this is a long post! and so many pictures. But I figured I took 'em so why not show 'em. Thank you for reading and commenting all year long - I really appreciate it and find so many wonderful new to me blogs to read via your comments.
If you happen to look at my Instagram you will know that I have continued my color blocking obsession to one more item which I also have been wearing a lot. A winter dress in wool knit - comfy and warm. After that I'm turning to sewing easy-peasy knit tops and that is about all for 2015. However I have lots more things to blog about and perhaps even a year-end review. Which I find strangely enjoyable despite serving no purpose other than to point out to myself all the patterns I have bought and not sewed up.
Happy Holidays to everyone, and I hope Santa brings you lots of sewing goodies!
Merry Christmas, Beth



0 Yorumlar